Showing posts with label wood. Show all posts

Wednesday, 5 October 2011

Vintage Crates

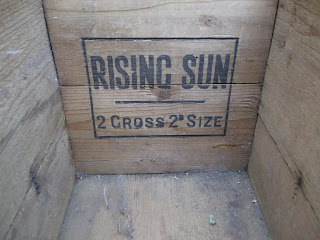
This delightful crate was a thank you gift from a friend. I had looked after her kitten for 3 weeks and, I must say, it was a pleasure to have a cat in the house again. However, the ever fabulous and fragrant Miss Heather is very thoughtful and she knows my love of old packaging and advertising items.

Lella Loves... Vintage Crates

It really is just too lovely for words! :)

Lella Loves... Vintage Crates

Dirt, dust, mud and rust. A few cobwebs don't bother me.

Lella Loves... Vintage Crates

I love this crate as it is quite small and makes a perfect little display unit when turned on its side.

Lella Loves... Vintage Crates

Mr Sit Still has been moved from the front door and he sits in quite nicely. I have included him in the display as a reminder that my kitty-sitting duties garnered the gift of the crate.

Lella Loves... Vintage Crates

And here it is! Books all in place. My friend is so thoughtful: the thank you card she bought me is a ginger tabby sitting in a box.

I will find this little display a cosy corner to sit in and I hope you enjoyed seeing it today.

Have fun, whatever you are doing.

Lella xx

http://lellalovescreativity.blogspot.com

Wednesday, 28 September 2011

Vintage Ice Cream Maker

If you love old kitchen equipment and you don't mind plenty of elbow grease, finds like this are for you and me alike.

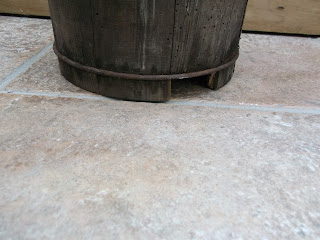
It is a Swedish 2 Quarts ice cream churn. At first I thought it might be a variation of a butter churn but I couldn't open the hinge no matter how much I tried.

However, a FaceBook friend said it might be an ice cream maker as she had something similar so back to the churn I went. I wiggled and wiggled, finally managing to open the hinge. Inside is a canister and two slimline paddles so she was spot on! (Thanks, Dawn :)

Lella Loves... Kitchenalia

Farm fresh to fabulous in two hours!  (Well... the actual polishing took 2 hours plus two cups of tea but I let it sit in the porch for two days so all the bugs could escape before I started working on it.)

Lella Loves... Kitchenalia

This was the condition I found it in. I paid £20 after some haggling but I know a flea market bargain when I see one.

Lella Loves... Kitchenalia

The pigeon poop and the cobwebs were free :)

Lella Loves... Kitchenalia

A little bit of damage is to be expected and it doesn't bother me as I love things which have had a life before me.

Lella Loves... Supplies

Gathering all my supplies together before I start the restoration.

Lella Loves... Restoration Projects

*Tip: Always apply black grate polish with a damp cloth. It works wonders on any piece of rusty metal.

Lella Loves... Kitchenalia

Gloves on and I start to rub on the grate polish. I wrapped the damp piece of towelling around my finger and I got in to all the nooks and crannies using a small brush.

Lella Loves... Kitchenalia

Metalwork complete, I started on the wooden parts. 

The coopered barrel was first and I used a dark wood polish which contained linseed oil to help feed the very dry wood.

Lella Loves... Kitchenalia

Ta-dah!

My lovely churn all finished and looking delicious.
I am really pleased how it turned out and I enjoyed the restoration. All I need to do now is find the right place to display it.

I do hope you had fun following my blog today. Pop back soon.

Lella  xx

http://lellalovescreativity.blogspot.com

Wednesday, 21 September 2011

Vintage Footstool

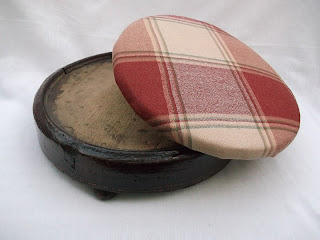
This darling little footstool is older than all of us and yet I found it, albeit in a sorry state, at a flea market. It is a 19th century walnut footstool with Tunbridge Ware inlay and bun feet.

Lella Loves... Vintage Footstool

Too cute for words. Perfect for little bottoms!

Lella Loves... Vintage Footstool

I recovered the top with a piece of upholstery fabric which was no bigger than a large dinner plate.

Lella Loves... Vintage Footstool

Much of the inlay is damaged or missing and its original cover would have been a needlework top. I don't mind the damage as the stool has a thousand stories to tell. Its current state is all part of its history.

Little stools like this can be found at larger antiques fairs and collectables markets where the dealers have the space to bring small furniture.

Lella Loves... Vintage Footstool

This is the underside: completely untouched and just as lovely.

Lella Loves... Vintage Footstool

I removed the seat pad by unscrewing the hand-made fixing.

Lella Loves... Vintage Footstool

Making sure I did not misplace the wooden nut, I removed the old fabric from the seat. For ease and speed, I reused the layer of filling.

Lella Loves... Vintage Footstool

I used a fabric with a pattern to centre the fabric and I did this by looking for one line to create my equator. I have placed the scissors to draw your eye to that line.

Lella Loves... Vintage Footstool

Using a heavy-duty staple gun, I fixed at the four cardinal points and then infilled. Every second staple, I checked to make sure the fabric was not being skewed out of shape.

The piece of upholstery fabric I chose was a designer sample which I picked up on my travels to a scrapstore. 

For more information on scrapstores, click on:


Lella Loves... Vintage Footstool

I married the two pieces back together and fixed with the original wooden nut.

Lella Loves... Vintage Footstool

My lovely finished stool which soon found a friend :)

Lella Loves... Vintage Footstool

If you quite fancy a little footstool like this for your special ted, keep an eye on eBay. A stool like this is easy to wrap and post.

A fun day out can be had if you go to a large collectables fair but pop in to antique centres when you see them. I rarely shop with an item in mind but I do have a wanted list and it helps me to focus as well enjoying the search.

Have a lovely day.

Lella  xx

http://lellalovescreativity.blogspot.com

Tuesday, 13 September 2011

Framing Up (Embroidered Sheers)

By using fabrics from luxury sample books, small creatives like this allow us to use up the smallest pieces of very expensive fabrics. It is framing up fabrics but with a twist.

Lella Loves... Embroidery Hoops

The thrifty thing about this project is that you can find embroidery hoops in charity shops and jumble sales for less than 50p. The fabulous embroidered sheers came from my scrapstore recycling club and were free.

Lella Loves... Scrap Fabrics

Scrap fabrics are one of my favourite things and these are very expensive embroidered sheers so the samples were very small.

Lella Loves... Embroidery Hoops

If you wanted to make your own, you will need:

Small embroidery hoop
Embroidery fabric off-cut
Applique
Button
Scissors

Lella Loves... Embroidery Hoops

Frame up your chosen sheer and gently tighten the hoop. Make sure you don't over-tighten as the nature of sheer will tear. 

Lella Loves... Embroidery Hoops

Turn the hoop over and trim the fabric close to the edge.

Lella Loves... Embroidery Hoops

Your embroidery hoop should now look like this from the front. There should be no bumps or creases.

Lella Loves... Embroidery Hoops

I chose a heart applique. Mine were pre-cut but you could make your own.

*Tip: Do not sew the heart on until you are happy with your layout.

Matching up a wooden embroidery hoop with embroidered sheers and a wooden button is a perfect combination.

Lella Loves... Embroidery Hoops

By adding your own touches to the applique, you make the project your own. A lovely wooden button tones in with the wooden hoop. 

Have fun with my blog-makes and take some time in gathering fabric as a good stash will inspire you. It is always more exciting to have choice; variety will allow your crafts to flow naturally.

Lella  xx

http://lellalovescreativity.blogspot.com

Wednesday, 31 August 2011

Framing Up (Posters and Prints)

Hello there and welcome to Wednesday's post.

Yesterday I spoke about scrapstores and local recycling projects/art clubs. Today I want to show you a very large, 16'' x 24'' poster which I picked up on my last visit to my 'scrappy-do'.

It is a lovely print, but with a huge crease along the bottom, and would have been damaged or maybe even torn sooner or later.

Lella Loves... Prints

Having brought the kettle and pumpkin print home a few weeks ago, I was wondering where to site it and I was even considering trimming it completely and putting it on my cork boards as a main backing print.

However, that was not meant to be. Last Thursday, I wandered into a charity shop whilst waiting for my husband. To my surprise, the charity shop had loads of photo frames and larger framed prints under the table.

I bought this very large framed print for the bargain price of...

Lella Loves... Framing Up

...three English pounds. Yes, £3 for a solid wood, glazed 16'' x 16'' frame. What a bargain  :)

Lella Loves... Framing Up

I took it home and whipped off the back. After taking out the print and the mount, I used the glass as a template over my kettle and pumpkin poster. (Remember, the print was free from the scrapstore.)

Lella Loves... Framing Up

And this is what the print looks like now. All framed and glazed and sitting happily in my kitchen. 

Lella Loves... Framing Up

This whole project came about because of the joy of scrapstores and the thrill of a charity shop visit.

If you like having things on your walls, you cannot go wrong with a rummage in a charity shop. Be open to buying frames before you have anything to put in them. 

Have a lovely day and don't forget to have a look at yesterday's post if you are interested in the idea of joining a scrapstore.

Lella xx

Wednesday, 24 August 2011

Old Pine Box

Today's project uses the wooden box I spoke about the other day. The lovely pine box you see here cost me £15 and I couldn't pay the dealer quickly enough.

Lella Loves... Old Pine Boxes

With the chilly nights creeping up on us, I intend to store fleece blankets and a throw in this box. Splinters are to be avoided so today's blog-make is a picture diary explaining how I lined it with some pretty paper.  

The roses wrapping paper was already in hand as, years ago, I had made the mistake of folding the  sheets of wrapping paper instead of rolling them. This meant I could no longer use the paper as gift wrapping because it looked like I had salvaged it from a received present. Not to worry, I thought, and so it sat, waiting for the perfect project.

If you wanted to try this for yourself, simply find a lovely wooden box and set aside an hour.

You will need:

Wrapping paper  (You could use scented drawers liners if the fragrance was pleasing.)
Scissors
PVA glue. 

Lella Loves... Old Pine Boxes

Find a suitable place to work and when you are ready to start, drizzle the PVA glue all over the bottom boards. 

Lella Loves... Old Pine Boxes

Be generous with the glue. This is the only time you will put glue directly on to the wood.

Lella Loves... Old Pine Boxes

Take your paper and, cutting from the straight line at the top, measure out two pieces to fit across the base. If your box is wider than the wrapping paper, make sure you cut two of every piece so you can paste in a mirrored fashion at each end, working inwards.

Lella Loves... Old Pine Boxes

Continue to cut and paste the paper to fit each section (sides) of your box. Work with bigger pieces of paper at the bottom and overlap every piece, every time. If you choose a pretty print, there is margin for error as pattern is forgiving. 

Lella Loves... Old Pine Boxes

Always glue the back of the paper and use the tips of your fingers to position the lining. I call it, 'tickling the mice'. Be gentle and, with the lightest touch, encourage the paper to slide into position.

Lella Loves... Old Pine Boxes

Work up from the base. When you get near the top of the box, take a straight edge of the paper and work downwards. Overlapping your lining paper by a few inches is better than a few centimetres.

Lella Loves... Old Pine Boxes

Continue to glue and line the box until you are satisfied. Use any left-overs to add another layer to the base. I lined mine twice as I wanted to build up a thicker, protective lining.  

*Tip: Lining twice is better and it is much easier to line it all at the same time than it would be to reline  in six months' time when your paper gets torn.

Lella Loves... Old Pine Boxes

It took me about an hour or so to cut out the paper, apply the glue and line the box completely, twice. I took photographs as I went along. The glue is ordinary, non-toxic PVA glue which I bought in Morrisons for £2. Use children's glue as it is safe, it is tacky within seconds and it dries clear within minutes.

Lella Loves... Old Pine Boxes

Ta...dah!   Here is my finished box. Fabulous, isn't it?

I am really happy with the way the box turned out. It will be perfect for the living room and will store several blankets and a few extra DVDs.

Scented drawer liners would have been lovely if I were storing socks or smalls but are not appropriate for this project.

Lella Loves... Old Pine Boxes

If you enjoyed this post, please leave me a comment.  I write this blog with ideas and creative projects which are easy and fun to do. Shopping on a budget and time spent being creative is something I am happy to share.

Three cheers for flea markets!   Hip, Hip....   

Lella :)  xx


Sunday, 21 August 2011

Flea Markets

So, it is Sunday morning and you are wondering what to do today. If you asked me, I would say where else could you possibly go than to your local flea market or car boot?

Lella Loves... Flea Markets

Everybody loves a bargain and even though you might not be in need of anything in particular, I think it is good for the soul to be out and about, browsing the stalls and chatting to sellers about their items or the weather.

Falling in love with something you didn't even know existed when you woke up this morning: I love that! The joy of handing over £2 for a very special purchase. Fabulous!

Here is an old marmalade pot I bought last week for £1. It is a perfect pencil pot.

Lella Loves... Old Packaging

You can experience all the above if you go to a collectables market with an open mind.
Take lots of change, a bag of bags and if you meet a really lovely dealer who sells you a bargain, buy him a cup of tea.

*Tip: Sellers are there to make money! Most of them earn their living as traders. Be fair but please don't pay the first price they say. 

Example: You see a large pine trunk with a broken lock. The ticket swinging in the breeze says £22 and, as you let the ticket fall and you stand up to look, the stall holder says, "It's yours for £18."

This is where I say to you, take off another 10% or 20% and propose your counter offer with, "Would £15 buy it?"

A friendly approach and a reasonable counter offer will secure your item 9 out of 10 times when haggling with a true dealer because the pine box scenario happened to me last week.

After I offered him £15, he did the inward whistle suck and laughed. I quickly followed my offer up with, "Oh... Go on! You know I'm lovely!" This made him smile and he couldn't say no and I went home with a very lovely, solid pine trunk for £15.

One-off day traders will spend 2 days pricing everything and they will be horrified at the thought of discounting their wares. Either walk away or pay the lady if she has something you want.

Most of all, have fun. 

Lella Loves... Flea Markets

Lella Loves... Flea Markets

Lella Loves... Flea Markets

Please message me if you were inspired to go to a car boot and you found something amazing. Comments can be left at any time. 

Best wishes and happy hunting.

Lella  xx

Lella Loves... Books

All books are free postage and are shipped from Amazon UK.

Click on any book to see price and availability.

Usually delivered within 48 hours.

More books to browse