Friday, 30 September 2011

Silk Flowers (Cream Anemones)

Hello there and welcome to another floral Friday. Silk flowers are a passion and every Friday I love to share one of my arrangements with you.

If you like anemones, you should like today's display.

Lella Loves... Silk Flowers

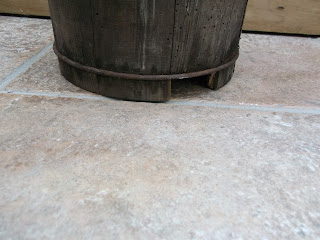
Here is an old garden tub which has anemones, hypericum and ivy in the display. I assure you, everything you see is an everlasting floral.

If you wanted to create this in your home, you will need:

40 Anemones
6 Ivy
3 Hypericum berries
Terracotta pot
Piece of tissue

Lella Loves... Old Pots

This pot was in my garden and I love the algae so I only cleaned the inside of the pot. You should use any tub or vase which suits your home.

*Tip: To achieve this look in a few months, not years, simply purchase a new terracotta pot, slather it with natural yoghurt and then place it under a large tree or behind a bush in your garden.

The covered pot needs to sit for 3 or 4 months in a damp corner but not where the yoghurt might get washed off in a downpour.

Lella Loves... Silk Flowers

You will need at least 40 anemones. They are very reasonably priced. These were purchased in The Range and were no more than 75p each. Dunelm has similar flowers in white and pink.

Lella Loves... Silk Flowers

Choose some everlasting berries for your arrangement as they give extra texture to the display. Really good examples, such as these hypericum heads, will cost about £4 a stem but they can be used for years so buy the best you can find.

Lella Loves... Silk Flowers

Floral supplies such as this ivy are a must as they give your arrangement much needed greenery. No matter which flowers you choose, there should be a happy balance of both petal and leaf. All flowers are beautiful so enjoy arranging them.

Similar ivy stems can be bought in Dunelm for 59p. A real bargain in my opinion!

Lella Loves... Silk Flowers

Cover the hole with a folded piece of tissue.

Lella Loves... Silk Flowers

To get started, lay the first ring of stems around the edge of your pot.

Lella Loves... Silk Flowers

Build up the anemones until you have a full tub.

Lella Loves... Silk Flowers

Once the anemones are in place, add your ivy. Try to place the taller stems more toward the centre and pop the shorter stems around the rim.

Lella Loves... Silk Flowers

When you are happy with your ivy placement, add the berries. Hypericum heads give good value for money as they are quite large and offer a lot of colour for the cost.

Your display should look something like this. I think it is lovely, and this very arrangement sits in my kitchen.

I hope you enjoyed today's post and feel free to leave a comment.

If you wanted to commission an arrangement, please contact me. Wealthy patrons are happily catered for.

Cheerio and have a great day.

Lella  xx

http://lellalovescreativity.blogspot.com

Thursday, 29 September 2011

Storage (Chandelier Earrings)

Ok. I admit it. I am an earring addict. I love chandelier earrings and the bigger, the better. However, they do become tangled very easily so I decided to have a sort out.

Today, I will share with you a few ideas on how I store them.

Lella Loves... Chandelier Earrings

Be prepared! I love all earrings with drops and hoops. Please tell me I am not the only person with a crazy earring obsession.

Lella Loves... Storage

If your fashion jewellery drawers look like this then take a look at today's blog.

The bangles have now been rehoused - another blog for another day! - and my earrings are now in coloured sections.

Lella Loves... Storage

I have been collecting business card boxes for months as they make handy dividers.

Use baskets or little gift boxes if you cannot find business card boxes. Try using other clear containers. There are alternatives such as take-away boxes which you can purchase new in some high street pound stores.

Lella Loves... Chandelier Earrings

To start, I sorted all the earrings into colours and separated the pairs which were still on cards (unworn) and the pairs which I have worn.

Lella Loves... Chandelier Earrings

Taking the two halves of the business card boxes, I lined each drawer with as many as would fit.

Lella Loves... Chandelier Earrings

There was plenty of fun in arranging the earrings in to their sections. This is the pink and green drawer.

Lella Loves... Chandelier Earrings

This is the blue and silvertone drawer. If I need cheering up, I open the drawers and smile :)

Lella Loves... Chandelier Earrings

And last but not least, the autumnal colours. This drawer is orange, red and brown beaded earrings.

All my earrings are fashion jewellery and you can see that I don't tend to spend more than 4 or 5 euros/pounds on any one pair. I am a fan of reduced rails and I have paid just £1 for many of the Primark earrings.

Many other pairs are from Claire's, Wallis, Primark and good old Sainsbury's range, TU.


If you are inspired to sort your jewellery, look for storage containers which won't snag your beads and hoops. In my make-up storage blog, I used lovely bright pink baskets which were 20p each from a discount store.

Here is the link to see that storage blog:


Have fun and please leave a comment if you liked this post.

Pop back soon,

Lella  xx

http://lellalovescreativity.blogspot.com

Wednesday, 28 September 2011

Vintage Ice Cream Maker

If you love old kitchen equipment and you don't mind plenty of elbow grease, finds like this are for you and me alike.

It is a Swedish 2 Quarts ice cream churn. At first I thought it might be a variation of a butter churn but I couldn't open the hinge no matter how much I tried.

However, a FaceBook friend said it might be an ice cream maker as she had something similar so back to the churn I went. I wiggled and wiggled, finally managing to open the hinge. Inside is a canister and two slimline paddles so she was spot on! (Thanks, Dawn :)

Lella Loves... Kitchenalia

Farm fresh to fabulous in two hours!  (Well... the actual polishing took 2 hours plus two cups of tea but I let it sit in the porch for two days so all the bugs could escape before I started working on it.)

Lella Loves... Kitchenalia

This was the condition I found it in. I paid £20 after some haggling but I know a flea market bargain when I see one.

Lella Loves... Kitchenalia

The pigeon poop and the cobwebs were free :)

Lella Loves... Kitchenalia

A little bit of damage is to be expected and it doesn't bother me as I love things which have had a life before me.

Lella Loves... Supplies

Gathering all my supplies together before I start the restoration.

Lella Loves... Restoration Projects

*Tip: Always apply black grate polish with a damp cloth. It works wonders on any piece of rusty metal.

Lella Loves... Kitchenalia

Gloves on and I start to rub on the grate polish. I wrapped the damp piece of towelling around my finger and I got in to all the nooks and crannies using a small brush.

Lella Loves... Kitchenalia

Metalwork complete, I started on the wooden parts. 

The coopered barrel was first and I used a dark wood polish which contained linseed oil to help feed the very dry wood.

Lella Loves... Kitchenalia

Ta-dah!

My lovely churn all finished and looking delicious.
I am really pleased how it turned out and I enjoyed the restoration. All I need to do now is find the right place to display it.

I do hope you had fun following my blog today. Pop back soon.

Lella  xx

http://lellalovescreativity.blogspot.com

Tuesday, 27 September 2011

Jam Jar Bonnets

This is a simple yet very pretty way to gift jam to a neighbour or a friend, as a small token of thanks, if they watered your plants whilst you were away for a few days.

Lella Loves... Fabric Crafts

Here is the jam with its pretty bonnet and a bow.

If you wanted to follow this blog-make, look out for some cotton material which has a fruit and flowers pattern.

Lella Loves... Fabric Crafts

You will need:

Jam
Fabric
Circular template
Pencil
Pinking shears
Ribbon


Lella Loves... Fabric

To start, iron your fabric and select a section where there are matching fruits to the jam.

Lella Loves... Fabric Crafts

Using your chosen template, mark out a circle with the pencil.

Lella Loves... Pinking Shears

Cut your fabric using pinking shears. Every household should have a pair! They add that extra pop to craft projects and kids love using them.

Lella Loves... Fabric Crafts

Take your cut out and lay it on the jam jar. It is better to have the circle too big than too small but trim to suit.

Lella Loves... Fabric Crafts

Use an elastic band to hold the fabric bonnet in place and take the time to create pleats if you like that look.

Lella Loves... Fabric Crafts

Now take your ribbon and make a little bow to finish off.

This is a good rainy-day project for children toward the end of term. Teachers and grannies alike love to receive presents :)

Have a lovely day.

Lella xx

http://lellalovescreativity.blogspot.com

Monday, 26 September 2011

Bunting (Calico)

Hello there and Happy Monday! Today's post shows you how to jazz up some single-sided, plain cotton bunting.

I usually make mine and my flags are double-sided so I know the effort required. After seeing this beaded calico bunting, there was now way I could leave it in the shop: all of it was coming home with me.

Lella Loves... Bunting

I found this in Oxfam. Not donated goods; it was in their Fair Trade - New Goods section - and it was only £4.99.

The beautiful beads were already sewn on: that alone saved me an hour.

Lella Loves... Bunting

These are hand-painted gift tags and they are wooden so they make great embellishments.

Snip off the loops and save the twine for decorating your seasonal wreath or maybe you are following yesterday's blog-make. If you wanted to make your own twiggy wreath, here is the link:

http://lellalovescreativity.blogspot.com/2011/09/wreath-hand-made.html

Lella Loves... Bunting

The weight of the wooden tags helps the bunting to swing nicely. By adding alternate shapes, you can create very simple but joyful decorations for an older child's room.

I love this look and it took no time at all to create.

Keep your eyes open for unusual decorations in the run up to the festive season and think of ways to enjoy them all year round.

Lella  xx

http://lellalovescreativity.blogspot.com

Sunday, 25 September 2011

Wreath (Handmade)

If you have ever wondered how to make a twiggy wreath, similar to this shop-bought example, I will show you in this easy blog-make.

Lella Loves... Handmade Wreaths

You can make your own for pennies. Much less than this large wreath which would be around £12.50.

Lella Loves... Hand-made Wreaths

Here is my finished wreath which took about 20 minutes. The only cost to this is the garden twine.

To follow this blog-make, you will need:

Honeysuckle
Bucket
Garden twine
Scissors

Lella Loves... Garden Twine

The first thing to do is to cut yourself a handful of 6 inch ties of garden twine. The reason for bright orange twine will become apparent as you make your wreath.

Lella Loves... Greenery

You will want access to a healthy honeysuckle bush. Try not to use cuttings unless they are garden fresh! Dried stems are not pliable and will snap.

Lella Loves... Handmade Wreaths

Turn your bucket upside down as you will use it to form your wreath.

Lella Loves... Handmade Wreaths

Take a metre of honeysuckle and strip the leaves off.

Lella Loves... Handmade Wreaths

Wrap it around your bucket and cross it over at the front.

Lella Loves... Handmade Wreaths

Using your twine, make a knot to secure your first ring.

Lella Loves... Handmade Wreaths

When you have made the first ring, trim off any long tails. Now take more honeysuckle and make another ring, then tie together.

Lella Loves... Handmade Wreaths

When your two rings are tied together, you have made your wreath's frame.

Now take more honeysuckle and wind it around the frame by going under and over.

Build your wreath to the size you want but, if you intend on dressing it, take into account the size of your decorations as you don't want to make it too bulky.

You could decorate with silk flowers, rusty bells, pine cones or ribbons. The choice is yours. Let your creativity flow - that's my motto!

Lella Loves... Hand-made Wreaths

This is how your finished wreath should look after about 20 minutes' work.

By using bright orange twine, you are still able to see it as your wreath grows.

Leave the twine in place as your wreath will take about a week to dry. The ties will become loose as the honeysuckle shrinks and then the orange twine will be easy to see to snip off.

Lella Loves... Handmade Wreaths

I hope you enjoyed today's blog-make and please try making one for the upcoming season.

If you make a few now, they will have time to dry and you will be ahead of yourself with Christmas gifts for friends and family.

Have fun :)

Lella  xx

http://lellalovescreativity.blogspot.com

Lella Loves... Books

All books are free postage and are shipped from Amazon UK.

Click on any book to see price and availability.

Usually delivered within 48 hours.

More books to browse